Tuesday, February 21, 2012

Altered Book

 I have been inspired to complete this altered book since receiving my monthly copy of the  craft stamper magazine.(July 2011 issue) I absolutely love the stuff they have in this and there are so many talented folk out there. They are a true inspiration
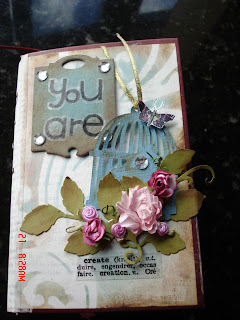
Here are the front, back and side views. I took out a couple of pages from the actual book and glued them onto the cover. I lightly covered each page with gesso and let it dry. The stencil is a Tim Holtz one and I inked it with Distress ink- Faded Jeans. The bird cage is a Tim Holtz die cut and the leaves are a die cut from heartfelt creations (by Spell binder). There are lots of swirly bits on the dye so I removed them for this piece as you don't always want so many bits on everything. I popped on a few little roses and gems to make it girly( for my daughter) and smudged a bit of brown onto the cage and leaves to give them the antique look.
 To make the book you need to glue a bunch of the pages together so that you have thick pages. I think I glued 10 to 15 pages together at a time with a 50% PVA and 50% water mix. Leave to dry over a couple of days. Cover each page with gesso and then you are ready to stamp, stick, glue, cut ...what ever to each page. All pages were inked with Distress Inks by Tim Holtz, and a lot of it was experimentation to see what went well together.


 I made little envelopes and placed inside some tags for writing on. Lots of the pages have space to add comments/poems/diary events or photos. I made it so that it could be used as a journal, place to keep treasures and so on.
I have stuck some ribbon on the top and bottom of several pages so that notes can be slid under and kept in place. Here I used a lovely sentiment on "LIVE" and slid that under there for my daughter to ponder


 A few of the tabs I pasted some lovely antique pictures on and left the underside blank for making notes on too.The ornate gate stamp is by Prima Stamps. It has a lovely antique sense about it and suited the mood of this page. I stamped in on a hand made pocket.Moths are from Papillon stamp set by Tim Holtz.

 Stamps used are TimHoltz  "visual artistry" Stampers anonymous collection from several sets. The large text stamp is from the Tim Holtz set Papillon
Monday, February 20, 2012

Nellie

 Here we have my grandmother, Helen as a young girl. I would think that she is not much older than 18-20years old. The dragon fly paper used as a base for the setting is from card stock called "my Mind's Eye". A lovely wee pad of  (20x 20cm) glittered  embossed papers.
The large blue flowers I hand made and used a stampin up brad to hold them together in the centre.The lettering was my first time using my cricut and using the Opposites Attract cartridge, and is a little shakey as the tricky part was getting those thin wee letters to stick down.(I have since learnt how to meld them together to avoid this problem in future!!). I have attached the surname  and used dimensional tape to hold the christian name above the surname.

 The use of a couple of creative memories punches for the "fence " and up the right side, frame the photo and add structure to the rest of the page.These are new to creative memories  late last year. I have overlaid the half circle cutout ( on the side )with some lace and my favourite ribbon vine. Topping this off with some little paper roses to match. The keys are using the Tim Holtz cutting template "Hardware Findings" I have used a little stamp from Pink Paislee Butterfly "Garden collection" for the bee and postage stamp mark

Summer Blooms

Again the roses are beautiful. I do so love the old fashioned roses. Here is Dublin Bay (red) and Graham Thomas (Yellow), two of my all time favourites, Currently I am painting  Graham Thomas, which is proving to be exceptionally difficult as it has so many little layers to get right.

Monday, February 13, 2012

Wedding Day

The wedding of the century ( I like to think it was..hehe)deserves a pretty page!
I had lots of fun making this LO,during our monthly scrapbooking session I go to, with a group of like minded ladies. Lots of laughs and always fun to go to. I love doing these sorts of pages as you get to rip and scrunch and distress to your hearts content. They all think I am a bit mad! I'm sure...

The Doily is cut using my cricut and a template from the Paper Lace cartridge. I smudged some brown and blue inks on to it to take away the brightness of the white card and to help it blend in more with the overlook of the page. I ran my favourite ribbon vine up and across the page, and piled the other bits and pieces on. I always seem to have trouble with the gems that are pre shaped and I see that the yellow scroll has got a bit out of control and ended way up the page. Never mind.
The blue flowers are from the prima collection ( I think) and I put little pearls on the yellow flower to help give then a bit of zing.
 I love how my little tiles turned out. I watched a video on Gabriella Pollacco's blog and made these. They are really simple and super effective and I think they  add  a little bit of class to the page. If you want to learn more take a look at Gabriella's blog. It is so inspirational and I love it http://gabriellepollacco.blogspot.co.nz/. I used Sculpey Clay which is baked for 15mins and then you paint and stamp as you wish.

The hanger is cut from the Tim Holtz "Hanging Sign" cutting template. I rubbed a bit of black distress inks on the edges to give it a bit of a distressed look

Friday, February 10, 2012

Sleeping beauty

Sometimes you can not believe your luck.....my daughter was never one to sleep in the day and here she is asleep on the couch
 I have used a stampin up punch to cut out the binder edge and gave it an aged look with some brown chalk and ink. The " envelope" is made from a piece of paper with a flap cut out separately. I cut a wee circle out and popped in a brad with a hole in it (sorry don't know it's real name) A little bit of colour was rubbed on the edge of the circle and edge of the envelope.
The brown font is a Creative memories sticker font . The little scroll was cut out using the cuttle bug and bosskut stencil. I added colour to the edges so tht it was in keeping with the rest of the page. A little heart badge is from a set by Pink Paislee  called "Sweetness'. The flower is from my stash. I used this gorgeous thistle motive from a 6x6 page by 7 gypsies "conservatory".

The 7gypsies pad has mixed pages with combinations of eggs and old writing, butterfiles and thistles, flowery antique wallpaper and flowers  butterflies and worms and so on.... you get the idea I am sure. It is one of my favourite collections!

Summer Fun

 This really is a simple little page. I am right into buntings at the moment and what better place to have them but by the seaside. I hand cut out the triangles ( Cut out a square of paper, I think I used 1" square. Fold in half and slightly crease one edge of the fold. Open out and cut from the left corner to the fold and repeat from the right corner to the fold...hey presto a triangle)I secured then to the page as if on a string and laid the leaf ribbon over the top, but you could use string, ribbon anything you choose.
The book binder edging is from a Stampin up punch

Wednesday, February 8, 2012

8 Months

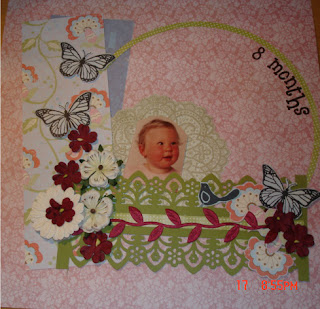
 8 Months old and adorable. Little pink cheeks and a dribble on the chin. I have used the fabulousMartha Stewart punch 'Garden Gate"   to cut the green card.. I overlaid this with red ribbon leaf, flowers and butterflies stamped from a Grace Taylor stamp set"Nature Girl" . I cut a thin circle out using creative memories cutting system, to balance the picture. The little doily is cut from pink paislee paper

You can see the intricacy of the Martha Stewart punch . This is a wonderfully versatile  punch as it is quite wide and you could cut it  in half as well as being used in the original width

Wednesday, February 1, 2012

Love this

What else do you do with a piece of bright pink paper???? Yup you scrap it. Fortunately my daughter's favourite colour was pink so it was easy peasy to match it up with something in a photo.

Fabulous word 'LOVE'  is from a creative memories sticker alphabet and it is really effective.....and comes in a range of colours and a smaller size too.

The little tree I cut out from  coloured paper and laid the leaves on to a plain (tan) background.the spotty paper gives the whole page a happy feeling and suits the moment (of two little imps playing /posing together).
The stalk was cut out free hand and dots just punched out to make the stamens.
The other little shapes are chip board from the stash.

Happy babes

 I had lots of fun with this page. I am trying to get more purposeful with the layering technique and if I let my self go I find that I can get there.
I have used "Happy Chick" lettering cut out on the cuttlebug machine. This is a favourite of mine and it always looks great on any page.
I used a Tim Holtz cut out using the 'Hardware Findings' tool  in the cuttlebug again,to make the little  rod for hanging the flowers and the birdcage from. The birdcage stamp is from the Pink Paislee Butterfly Garden's collection set. It is a beautiful stamp set, and quite rare and hard to find. I found my set on Trade Me and the first time it was on there I missed out, however the buyer did not end up paying so I managed to score it. Yahoo! cause I just love it

At the bottom of the pictures I cut out a little pram from some papers by Webster pages (petite papers) added some pretty roses and satin leaves.