Showing posts with label Card. Show all posts

Sunday, June 1, 2014

Happy Mothers'd Day Mum

Happy Mother's Day


 A wee card I put together for my Mum.I used the Tim Hotlz mannequin stamp and then dressed it with some pretty boarder lace with beads. The backGround was coloured with Dylusions sprays and Stamped with TIM HOLTZ STAMPS . Kindy Glitz was applied to areas of the flowers for a bit more sparkle

Friday, January 17, 2014

Christmas cards 2013

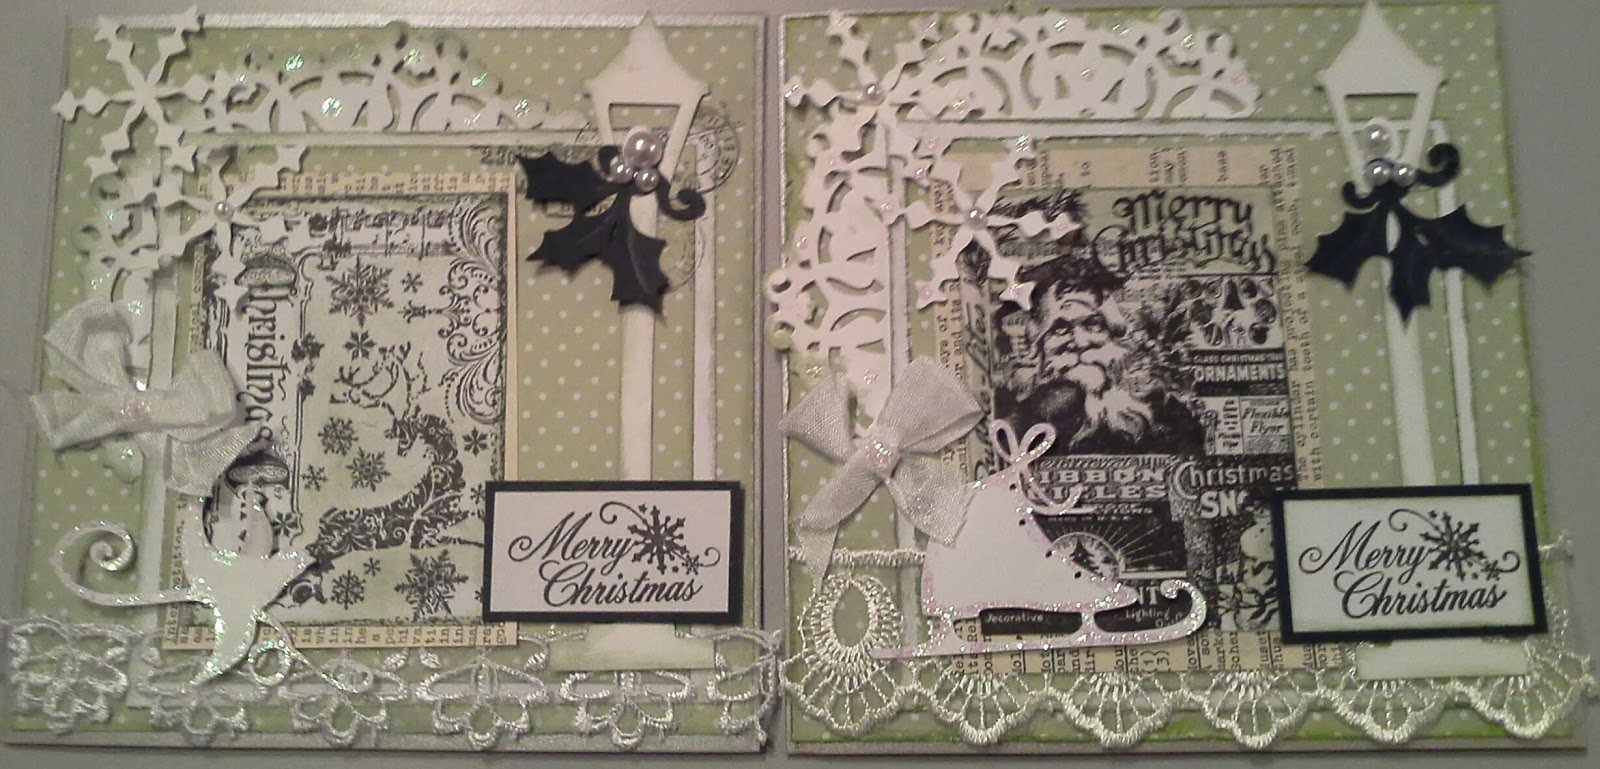
I made a set of Christmas cards for family and friends.. All using the same theme, using Tim Holtz stamps, doily cutouts, ribbon, glitter and a Merry Christmas stamp. The lamp post, holly skates, birds etc were cut out using the Cricut.


Here are some of the wenvelopes I made for the cards. They were quite large and I could not find any premade envelopes to fit, so used the we R Memory Keepers envelope board,and stamped some small cards with Post Card heading from a Tim Holtz collection.

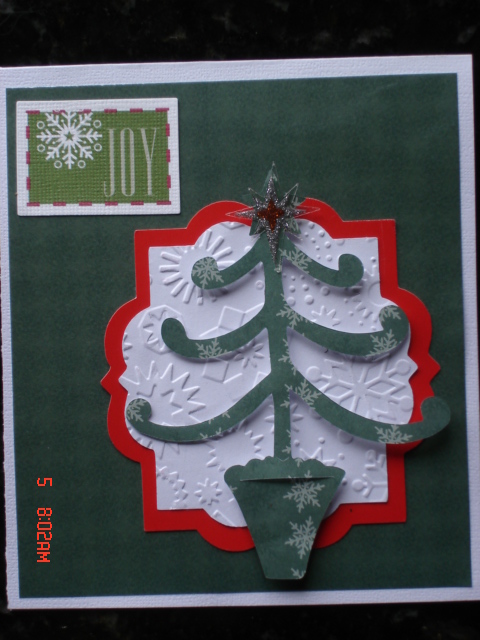
 This last one I made for my hubby. I masked a couple of stamps to get the joy/swirl composition. I stamped some snowflakes and then applied glue and green glitter to the snow flakes.
The cut out allowed me to put some old sheet music and lace behind the main picture.It was all finished off with a wee bow at around the main picture ( Tim Holtz)


Saturday, June 8, 2013

Inspiration


Inspire  yourself.. aren't we all looking for inpiration at some time. I have just brought a new Coutour creations Endless Dreams-Pergola dye and was dying to use it. Some inspiration came from Pinterest and this is what I ended up with.

The card was embossed with Tim Holtz "stitches" embosser on the edges.The background pater was stamped with Tim Holtz Papillion text in Archival Brillance ink- Moonlight white.

The dye was cut out and a wee swallow from a Cricut cartridge was placed on the top of the pergola. A few gems were attached to give it a more dimensional look..then the fun started.
From my stash I sourced these flowers and spent some time looking for the right shape and size leaves to place under the flowers. I ended up using a Dye from Heartfelt Creations by Spellbinders called Belle Rose. I used the thorny leave dye cut in this collection which was perfect
Little gems were placed into the purple flowers.
The sentiment from Pink Paislee stamp set Spring Jubilee was stamped onto card and placed at the bottom of the card.
I hope you enjoy my end result


Happy 75th Birthday

For Aunty Moira
My Mum's best friend turned 75 a week ago and as I could not attend the function I wanted to make her an extra special card.
A piece of background pre-patterned paper was selected from my stash and then stamped with a script Tim Holtz "Papillion" in gold.
The pretty white doily type edging was cut using  the Cricut Elegant Edges cartridge.
Flowers from my stash were placed up the side of the card and leaves cut using another Cricut cartridge ( can't remember ..LOL!)
The sentiment was printed on vellum and placed on a precut grunge card shape from my stash also. the top card was placed onto another piece of gold card and then layered onto the edging cut out. These were then all mounted onto a matching piece of turquoise  card.

For Charlotte

For Charlotte.... A new baby in our midst. My best friend is now a grandma and this is the card I made for the lucky new parents.
 Firstly I selected a background print that I wanted to be mainly pink. This pretty background paper is from Kaiser craft "Sweet Nothings" pad and was perfect with the flowers and butterflies on it. That was the inspiration for the rest of the card.
I ripped a piece of cardboard to the size I wanted and used this as the base  adding a bit of gesso to take away the "brownness' of the card and let this dry. I cut out a doily using a Coutour Creations doily "Autumn Reflections". This was then lightly sponged with one of the new Tim Holts Distress Inks colours called "Pinked Raspberry".
 A Birdcage was cut out using Spellbinders "Bird Sanctury" shapeability die and I glued lace to the top of the frame and also placed lace along the bottom of the cage  underneath the cut out so that there is a hit of lace showing there also.
I played around with the placement of the flowers from my stash. A piece of the beady string thingee was interlaced around the cage and through the flowers . I thought this added a bit more femininity to the card.
Little butterflies using  a Cherry Lyn design dye "Exotic Butterfly" small were used and I cut out two of the three butterflies, and  placed little gems in the middle to add a bit of prettiness to them. Pearls were added to the cage.

The words were cut using the Cricut "Graphically Speaking" cartridge. I sprayed the words with Tattered Angels "Glimmer mist-Silver" to add a bit of sparkle and dimension to the words.
"Welcome" (Stampin up) was stamped onto a piece of card, the edges distressed with a dusting of ink and attached using puff dots.


Monday, May 27, 2013

Live Like You Mean It

A birthday card for my daughter. As I enjoyed making the previous card so much I wanted to make another one and chose to make it for Rebekah. She was so delighted with it and told me it was the best card I had made for her so far. I was chuffed.She knows how much time I put into these  cards and knows that they come with lots of love.


The butterfly was stamped onto card and coloured using Mungyo watercolour crayons and the swirl was cut using a template on the big shot cutter.

The inside was layer with a left over piece from something I cut out using the cricut and then a flower shape with the sentiment stamped from a Stampin up set on top


Friendship Card

I have been making cards for a rainy day over the last month or so to add to my stash.
This card was inspired by something I saw on a facebook site  called Scrapbooking247.
I loved the idea of the recessed picture behind the main card area. I cut the shape out using my Cricut .
I have stamped some images onto theleft side of the card and a bird onto a separate piece of card and fussy cut out. This was attached to the main body of the card with puff dots.

The picture card behind the bird was attached using puff dots so that there is a gap between it and the main body of the card. A chip board swirl was painted and then placed under the bird. Flowers were placed at the bottom of the card. A sentiment stamped and placed on top of a boarder piece of card and adhered with puff dots too.


 The picture card behind the bird was attached using puff dots so that there is a gap between it and the main body of the card. A chip board swirl was painted and then placed under the bird. 
Flowers were placed at the bottom of the card.Another chipboard circle was placed under the flowers. A sentiment was stamped and placed on top of a boarder piece of card and adhered with puff dots too.


Mothers day

I  was so excited to make this card for my Mum. She was going to be going overseas for several months so she got it a couple of weeks before Mothers day. Because she was travelling, I did not think it was much sense to send flowers so I sent them on a card instead.
I cut the lattice template out  of silver paper using a Cricut  template and background in patterned paper. I made a little tussie mussie bouquet from my flower stash and a piece of yellow ribbon to pull it altogether with the yellow flowers and yellow in the little card that I tucked in behind the ribbon and a hat pin through the ribbon to finish it all off.. I loved the end result and Mum was delighted with it.


Friday, April 19, 2013

For Lania

Happy Birthday to my niece Lania.
Here is another card I made playing around with the Cricut. The idea was sourced through theCricut magazine March 2012)
The base of the card was cut using the Elegant Edges "Scollop 2" template. I cut two pieces of white card stock out at  4 3/4 ", and one piece of pink at 4 1/4 "

 A doily pattern was cut out of the same white card stock and place under the pink frame.
 The little deer were cut from the Cindy Loo cartridge. Little bows were tied around the neck and gems were placed on the little dot cut outs on the body of the deer.

A journal box was stamped onto white card and a sentiment stamped onto this in pink. A fancy brad and ribbon was attached to the journal box to make it a bit mor girly.

Jen's birthday

I had lots of fun with my Cricut making this card. When I get time I sit and play so that I can learn what I can do and how things turn out. It is fun and you always end up with something very pretty.

 I used Elegant Edges "flower 3" cartridge to cut out the frame in a patterned paper. A piece of red lightly patterned paper was cut in a circle to go behind the frame. A piece of lace was placed behind the frame but centered in it
 For the pretty filigree in the middle of the card I used Cindy Loo cartirdge- figure 1.This was cut out of cream card stock. I cut out some butterflies using the background and frame papers. The butterflies cut out of the red patterned paper were embossed  in silver and placed on the bigger butterflies to give the card some depth.
Bling was placed on the filigree . Asentiment was placed on a piece of matching card with a piece of lace laid under it but showing on the bottom edge.

Saturday, March 2, 2013

Globe card

I had so much fun making this simple but effective card. The stamps are from docrafts papermania "Chronology" set. http://www.docrafts.com/ and the card is featured in here too.
I have cut out the card, a complementing colour card and then used white card to stamp the background cogs onto. I then added a little colour using Tim Holtz "Walnut Stain" distress Ink.
The globe as stamped three times. The first image was cut out in its entirety and placed on top of the cogs. The second image was just the globe itself with no stand, and the third image I cut out just the central circular,horizontal frame, to give it a three D look. I added in to the image to give it a bit of an antique lool. The outer card was embossed by Couture Creations "Heavy Duty" emboss envelope. A sentiment was cut out and swiped with ink and attached with puff spots .

Monday, December 10, 2012

Christmas

My last Christmas card for my mama.

I Embosssed the background using the Couture Creations "Early Songbird" folder. I stamped the  "LeBlanche" Santa stamp onto card  and the edges were smudged with the same colour ink.I  cut out three circles using the Big Shot and Spellbinders Nestabilities Classic Scolloped circles. Ribbon and bling were placed on the card to pretty it up and again a quick and easy but lovely finished result.

Simplicity

Simplicity...sometimes is beautiful, and is quick if you need a card ready for an occasion. Here are a couple of really quick and easy cards that I have made to try and simplify things for myself. Not too sure that is something I enjoy as I love to layer , ink and stamp.
 Three little squares were cut out, stamped with a matching colour and laid onto ribbon and ricrack ribbon. The inside of the card had three same sized squares stamped and placed in a row inside using puff squares to give it a bit of interest. Really quick and easy, but pretty I think.


This little card I made using the Cricut and overlaid the large flower ( circle) with fancy cut leaves and petals to give a very pretty effect. A couple of little flowers were cut out with a punch and a bit of bling was added to these and the main area...voila! a card made in about 10 minutes!

Sunday, December 9, 2012

For Adele

I made this card for a friend who was celebrating a big birthday
It is pretty simple but looks really nice when finished. Firstly stamp your main piece of card with your desired stamp. I used Tim Holtz, Papillion and placed the butterflies down the side ( which is the bottom of the card) and then selected a few other places on the right side ( top of the card). In between I used a french script , masking the butterflies as I went to prevent the script covering them. I placed a piece of  card "wire" mesh under the main pictrue, which is one of the butterflies from the same stamp set. This is stamped on a separate piece of card and placed under another piece of  pretty card which has a circle cut out of it to place the butterfly in the centre. I  rubbed ink around the inner of the circle and the outside edges. This was placed on a piece of mulberry paper and all adhered down.

On the inside of the card I used another piece of the pretty paper  and a sentiment placed on the piece of card left over from the front of the card. I wanted to do something a bit different so I stamped the butterflies on card, coloured them with Myungo crayons ( wet) and then attached them to ribbon so that they cascade down the card when you open it. A little bit of bling was adhered to the centre of each butterfly

Christmas

I am frantically trying to finish my Christmas cards, so that my friends and family get them this side of Christmas. I have found that I have just run out of time again this year. I really must start in October!
The first one was using a Tim Holtz die, which is pretty easy to get a great card with. I added a few embellishments to add a bit of sparkle and a sentiment.The shapes on the top card were cut out with the Cricut and embosssed.
The next one was using an embossing folder .I added some sparkle to the tree. I Placed a ribbon around the trunk and cut another wee tree out of scraps, placing the flowers and leaves underneath the tree and placed to the side. A Stampin Up sentiment was stamped at the bottom


The third card was  using a variation of the same and placing one or two snow flakes on top . The deer is a Stampin up stamp from the Reindeer Print set. I cut the shapes out on the Cricut and embossed the bottom piece with another embossing template. Bling was added to the snowdrp and the reindeer antlers. Blue ink was smiudged around the background shape and the snowflake and sentiment pieces to make a lovely fresh looking card. A little bit different to the traditional colours


Tuesday, November 27, 2012

Happy Birthday

It is a while since I have done much craftying, but now that I have got my travels documented and pictures in an album, I can start to play again.
 I made this card for hubby. It was lots of fun and is easy to put together. Essentially you need the card itself and 3 other pieces of card. On the bottom card I stamped themed stamps and in this case fish, rope and compass from a Kaisercraft set called Hunt and Gather. I was really impressed with the image as it came out very clear and had good detail. I then rubbed distress ink colours Broken China,Chipped Sapphire, Faded Jeans,Peeled Paint and others from my stash, until the desired affect . The next piece of card was stamped with a Tim Holtz expression and lightly coloured with the same blue inks. Finally I stamped the boat on another piece of card and gentally ripped the edge to give it that old vintage look and buffed the image with Faded Jeans and Wild Honey.