Showing posts with label Heritage. Show all posts
Wednesday, April 3, 2013
A rainbow of flowers
The background paper is another DCWV paper from the "Ciao Bella" stack.It really does the talking for you so I added some matching bits to the opposite side of the rose. The rose was fancy cut on the top edge and the photo placed in behind it. I placed little flowers and gems along the red line and layered some leaves, roses, a little scroll and fancy cut birdcage on top of the photo. I have yet to find out who these people exactly are if you are wondering why there is no wording.
Annie G
Black paper was used as the mounting pcolour. Again I used two papers from DCWV 'The Chateau Lavender' stack, choosing to cut the papers into 2/3rds and 1/3rd.The cut line is hidden under a piece of cream lace. I have matched up the flowers using complimentary purple and green with little white daisies and leaves in purple and green to pull the colours out of the papers too.A wee bit of bling was placed behind the flowers and little silver dragon flies were used to finish the page off.
Martha
This original photo was damaged, but I wanted to keep to the authenticity of it and chose not to have it corrected. I love the purple paper which is from a DCWV collection called the Chateau Lavender Stack. Purple seems to compliment the old sepia photos. A pretty piece of lace was laid down the right site and another simpler piece of lace placed along the bottom. The scroll was cut out using my cricut and given the distress look with a bit of taupe ink smudged on the edges . A trinket was layered on the top. Little resin flowers were left the cream colour to pull in the colour of the lace . A pair of trinket scissors was placed in the opposite corner .
Julius and Augusta
Julius and Augusta, are the couple with those 9 children.Here they are at a grand old age. Study stock I would say by the looks of them.
A doily (purchased in Greece- part of a table cloth that I cut up as it was made of all these doilies joined together)A couple of clock stamped onto brown card and a gem placed on them. A wee trinket behind them and then flower up the side, which seemed apt as these photos are taken in the garden. Again simple but the decorations set off the simplicity of the photos
Wedding couple
This paper seemed to speak to me as being so appropriate for my grandfather and grandmother on their wedding day....... so I just used minimal adornments as I thought it was lovely enough. I fancy cut around the roses and placed the photo under this edge. Again the flowers I have matched to the paper seem to be off colour as red rather than pink but they do look nice in reality. I scrunched up a bit of lace and stuck two long pins through the lace. To keep the lace scrunched I taped it to the paper as it is. A wee bid stmap was fancy cut and placed at the bottom of the page.
Grannie B
Complimentary paper was selected. The photo was mounted on a matching paper and then the photo was embellished with a cut out birdcage and candelabra. Brown pearls were placed on these cut outs to give them a bit of a lift. Paper roses in blush pink were placed on the bird cage and some little sprigs of white flowers [that were sold as wedding decorations] were placed along the bottom. Here again is an old piece of my jewellery and this time it is an old hair clip. As you can see I have always loved a bit of bling (lol!) A piece of oval paper chip has been covered and is waiting for a name to be placed on it.
Family home
The family home was in a place called Puhoi. My grandfather came across on a ship from Bohemia , as a baby, and the family along with many others settled in the wilderness of this rough steep area. I am not sure if you can see how small the house is but it housed 11 family members ( 9 brothers and sisters) My grandfather is the baby on my great grandma's lap.
Again simplicity ruled. Though I say simplicity it always takes time to cut, match papers and flowers etc. The photo has tended to make the flowers look redder and the background paper orange, but in reality they compliment each other nicely. I hand made the tag, smudged some ink on the edge to age it and the rub on had gone past it 'use by date' so I just adhered it to the tag rather than try and get it on to the tag all in one piece. I use a gate embellishment and the lettering was from my stash of alphabets.
Great Grand Parents
I like the simplicity of some of the pages I have done for my heritage photos. The interesting thing on this page is that big jewelled brooch on the left was something I used to wear in the 1980's! Good grief. I cannot even remember when or where I would have worn it.
A little bit of lace was added to the bottom edge of the photo and a trailing of wee leaves and flowers. Quick and easy.
Off to War
Here is another page I have done for the family album. Here my grandfather is preparing to go off to war. Oh so young!. The page was simply adorned with a few things that fitted with the era, which some how seems fitting gfor the sombre occasion. The clock and pen nib stamps are Tim Holtz. Little red roses were placed on the side ( like red poppies for the ANZACS). I am so grateful that my grandfather returned after the war but I never really had a chance to know him as he died when I was about 3.
Saturday, March 2, 2013
Millie
I have been doing a lot of work on the family album. Here is one of the pages of one of my grandfathers sisters- Millie.A lot of bits and pieces were placed together up the right hand side. I started with a piece of lace and then, a preprinted chipboard cut out.I have also used some flowers, and tulle roses across the bottom. The little tile with the insect, I made using sculpy clay which was painted in acrylic paint and then stamped. These were made after seeing a tutorial on Gabrielle Pollacco 's blog . They are really quick and easy to make and so pretty to add to scrapbooking pages.I thought the pretty purple page compimented the vintage photo.


Monday, April 16, 2012
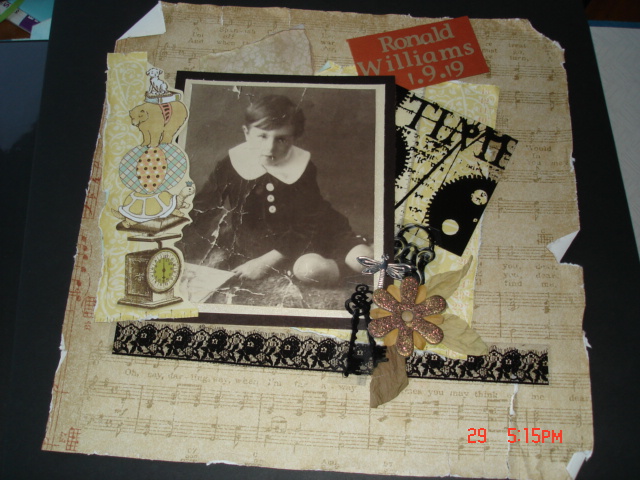
Grandad
A couple of pages of my grandfather when he was just a wee boy. I have used gorgeous paper from the DCWV range called "the Mariposa Stack". they are such lavish pages that you really do not need to add too much else to them
Monday, April 9, 2012
After the wedding
Here I have cut out the shape by using a template and manually cutting the shape.( no machine used on this occasion). The photo has a contrasting colour mounted to help it pop out. Little tears were made and lace popped behind these to give an antique appearance.
The fence is cut using a Creative memories shape cutter. I interwove roses through it to make it appear that they were growing along it. Ribbon leaves were placed up the right side to help balance the page. Beautiful paper roses were placed in the corner and a chip board print is placed at the bottom. A bit of bling was addes and pink pearls placed intermittantly on the fence to tie it all together. A wee bird was placed at the top( not sure if I stamped this or it was a rub on now) for a bit of a quirky feel to the page.
The key hole is from Tim Holtz "Hardware Findings: and the scroll is tim Holtz "Elegant Fourishes" alterations Sizzix cutting templates. These were placed on the left side to help balance the page and give this corner a bit of zing
The fence is cut using a Creative memories shape cutter. I interwove roses through it to make it appear that they were growing along it. Ribbon leaves were placed up the right side to help balance the page. Beautiful paper roses were placed in the corner and a chip board print is placed at the bottom. A bit of bling was addes and pink pearls placed intermittantly on the fence to tie it all together. A wee bird was placed at the top( not sure if I stamped this or it was a rub on now) for a bit of a quirky feel to the page.
The key hole is from Tim Holtz "Hardware Findings: and the scroll is tim Holtz "Elegant Fourishes" alterations Sizzix cutting templates. These were placed on the left side to help balance the page and give this corner a bit of zing
Wedding Day (2)
I started by really distressing the main page. I thoroughly wet the outside of the paper so that I could scrunch it alot, and then I had to let it dry before doing anything else to it. As it was fairly heavy paper it took a bit of wetting to be able to scunch it up. I cut out a circle in the middle and distressed the outside of this with a distressing tool and tearing the paper. I laid a preprinted overlay of lace and then place flowers and lace around the outside of the circle.
The top "hinge' is from Tim Holtz templates for cutting out shapes and I wove leaves and roses around this. The lettering was cut using the cricut but is was one of my first attempts and I did not realise or know how to get the lettering all one size. (I do now :)LOL) so I left it as it was, you know as it is all a learning thing and there are no rights or wrongs with scrapbooking
Sunday, March 4, 2012
Ian and Susan
I put together a couple of complementing papers and over the paper join placed a matching strip of ribbon. The candlelabra is a cut out from a set of cards and the adornments are rub ons.All in all it is simple but effective. Sometimes "less is more"
Monday, February 20, 2012
Nellie
Here we have my grandmother, Helen as a young girl. I would think that she is not much older than 18-20years old. The dragon fly paper used as a base for the setting is from card stock called "my Mind's Eye". A lovely wee pad of (20x 20cm) glittered embossed papers.
The large blue flowers I hand made and used a stampin up brad to hold them together in the centre.The lettering was my first time using my cricut and using the Opposites Attract cartridge, and is a little shakey as the tricky part was getting those thin wee letters to stick down.(I have since learnt how to meld them together to avoid this problem in future!!). I have attached the surname and used dimensional tape to hold the christian name above the surname.
The use of a couple of creative memories punches for the "fence " and up the right side, frame the photo and add structure to the rest of the page.These are new to creative memories late last year. I have overlaid the half circle cutout ( on the side )with some lace and my favourite ribbon vine. Topping this off with some little paper roses to match. The keys are using the Tim Holtz cutting template "Hardware Findings" I have used a little stamp from Pink Paislee Butterfly "Garden collection" for the bee and postage stamp mark
The large blue flowers I hand made and used a stampin up brad to hold them together in the centre.The lettering was my first time using my cricut and using the Opposites Attract cartridge, and is a little shakey as the tricky part was getting those thin wee letters to stick down.(I have since learnt how to meld them together to avoid this problem in future!!). I have attached the surname and used dimensional tape to hold the christian name above the surname.
The use of a couple of creative memories punches for the "fence " and up the right side, frame the photo and add structure to the rest of the page.These are new to creative memories late last year. I have overlaid the half circle cutout ( on the side )with some lace and my favourite ribbon vine. Topping this off with some little paper roses to match. The keys are using the Tim Holtz cutting template "Hardware Findings" I have used a little stamp from Pink Paislee Butterfly "Garden collection" for the bee and postage stamp mark
Monday, February 13, 2012
Wedding Day
The wedding of the century ( I like to think it was..hehe)deserves a pretty page!
I had lots of fun making this LO,during our monthly scrapbooking session I go to, with a group of like minded ladies. Lots of laughs and always fun to go to. I love doing these sorts of pages as you get to rip and scrunch and distress to your hearts content. They all think I am a bit mad! I'm sure...The Doily is cut using my cricut and a template from the Paper Lace cartridge. I smudged some brown and blue inks on to it to take away the brightness of the white card and to help it blend in more with the overlook of the page. I ran my favourite ribbon vine up and across the page, and piled the other bits and pieces on. I always seem to have trouble with the gems that are pre shaped and I see that the yellow scroll has got a bit out of control and ended way up the page. Never mind.
The blue flowers are from the prima collection ( I think) and I put little pearls on the yellow flower to help give then a bit of zing.
I love how my little tiles turned out. I watched a video on Gabriella Pollacco's blog and made these. They are really simple and super effective and I think they add a little bit of class to the page. If you want to learn more take a look at Gabriella's blog. It is so inspirational and I love it http://gabriellepollacco.blogspot.co.nz/. I used Sculpey Clay which is baked for 15mins and then you paint and stamp as you wish.
The hanger is cut from the Tim Holtz "Hanging Sign" cutting template. I rubbed a bit of black distress inks on the edges to give it a bit of a distressed look
Friday, June 3, 2011
Heritage
I am going to a large craft/scrapbooking show in a few weeks and have booked a couple of classes to learn further techniques in the layering of pages to get some of the sumputous looks that you see all aroound the world.
It really is having the courage to do it and go with your convictions and I guess that I am still a bit timid...but looking forward to the show immensly
The young grandparents Valerie and Ronald.
The larger 3 flowers are hand made and examples of ones I found on the blog 'What a Beautiful Mess" They are so easy to make and so beautiful. You can make them in any colour to match your layout...give it a go
Pretty in lavender and blue
I fell in love with the colours of this page. It is my favourite page so far, and i am so pleased with how it turned out
Heritage
A young Ron going off to the war at 16years old. He was one of the lucky ones who returned
I used a Tim Holtz mask to do the background This is a great way to vary a piece of background paper. You can match the colours to your photos and accessories.
Subscribe to:
Posts (Atom)